How to design and develop a conference presentation - and why it pays to think like a DJ
A complete step-by-step breakdown of how I built (and booked) a session at a globally-renowned conference - and why it pays to think like a DJ
A complete step-by-step breakdown of how I built (and booked) a session at a globally-renowned conference
A couple of weeks ago I spoke at CMX Summit, running a session on the power of storytelling.
Afterwards, I was exhausted but elated: there were over 300 people in the room; the live chat fizzed with activity; and my Twitter mentions went a little wild. According to a bunch of the attendees, TED should be booking me to speak (I assume they mean the conference, rather than Ted Lasso at AFC Richmond - although frankly I’m down for either).
But beyond my not-so-humblebrag, I was struck by something far more important.
A couple of people had asked how I’d gone about building this workshop/keynote hybrid. While there are plenty of people talking about their speaking gigs, I realized there’s remarkably little shared about how the presentations themselves come together.
So, in appropriately meta style, here’s the full story of how I made this story session. And to add one more meta layer, this post follows the same story structure I shared in the session itself.
So you can easily apply it to your own projects, I’ve split the process into 11 bitesize parts (plus a bonus):
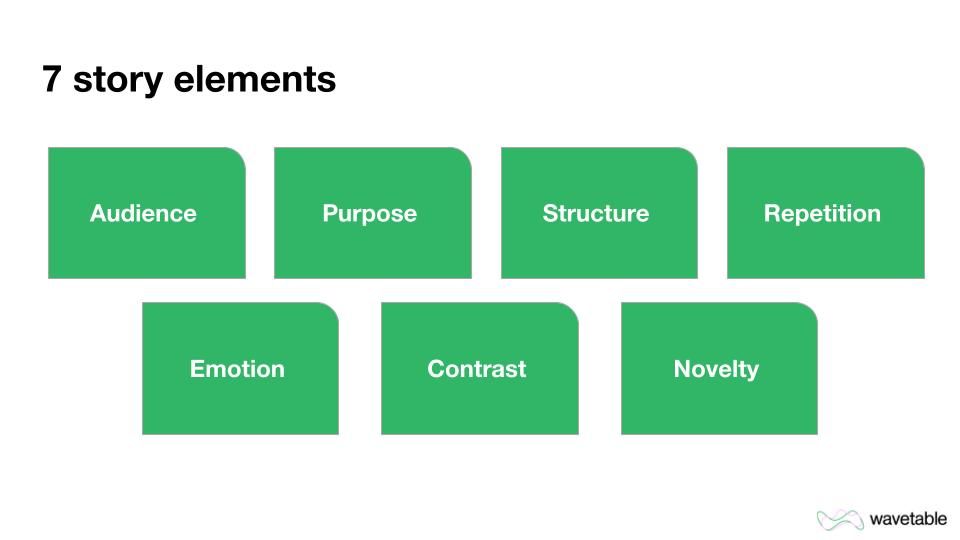
- Topic & Outcomes
- Audience
- Purpose
- Structure
- Collating
- Repetition
- Emotion
- Contrast
- Novelty
- Story Type
- Final Finesse
- Bonus: Landing the gig
Let’s get into it.
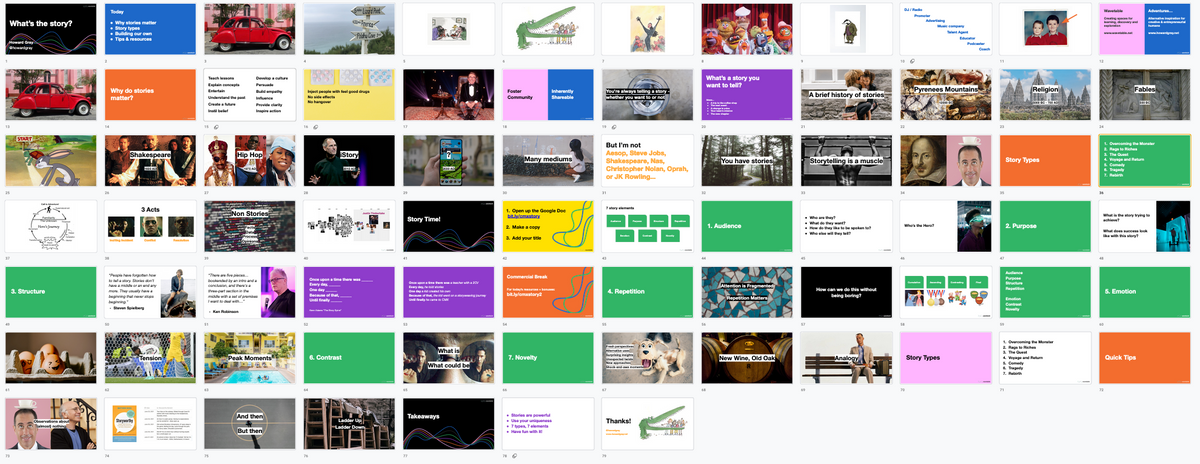
Note: you can check out the full session I delivered here
1. Topic & Outcomes
Ok, you may be rolling your eyes that we’re starting with something so basic, but hear me out. Solid foundational elements are crucial: if they’re weak or vague, everything else will follow suit.
Topic
Let’s begin with our topic. Some speakers will get asked to talk about a very specific topic; others can speak about anything they like because of their reputation or status. I find somewhere in the middle is a nice place to be: the organizers want you because of a certain expertise you possess, but there’s a conversation to have around the specifics of what the audience will find most valuable.
This was the case for me with CMX. We’d already established the overarching topic was storytelling, but knew it was very broad. Luckily, the CMX team were very in tune with their audience, and sent me some ideas, themes and challenges their community were most interested in (e.g. “a framework for how they can hone their community's story”).
Having primers like these are helpful to take a broad topic (Storytelling, Fly Fishing, Digital Music Rights, etc.) into something more specific.
After we spent some time clarifying the primers, it was on to the next two steps: Outcomes; and a Title & Tagline.
Outcomes
It may seem counterintuitive to do outcomes before a title, but I find this order much easier to tackle.
Crafting outcomes deserves an entire post to itself (especially as so many outcomes listed on conference programming are awful), but here’s one easy and effective way to surface an outcome.
Complete this sentence - “after this session you’ll be able to…” - with an action verb (make, see, design, cook, etc.) and a tangible ‘thing’. I usually aim for 3 outcomes for one session.
Here’s an example:
After this session you’ll be able to use the 5-part story spine to tell any story you like.
You might be wondering if using outcomes like this applies to a keynote talk as well as a workshop. To paraphrase Seth Godin (who happened to be the headline speaker at CMX Summit) - the true purpose of a talk is to create an emotional shift in the audience; a change of state. It’s not the same as a workshop, which have very clear outcomes to enable work and learning to occur in real time.
However, every type of presentation should give the audience something. I recommend doing this exercise no matter what format you’re delivering. If nothing else, it’ll make your thinking sharper and save you going down rabbit holes further into the design process (more on that later).
Those primers I mentioned in the previous made it easy to create some strong outcomes. All the more reasons to get those primers ahead of time.
Title & Tagline
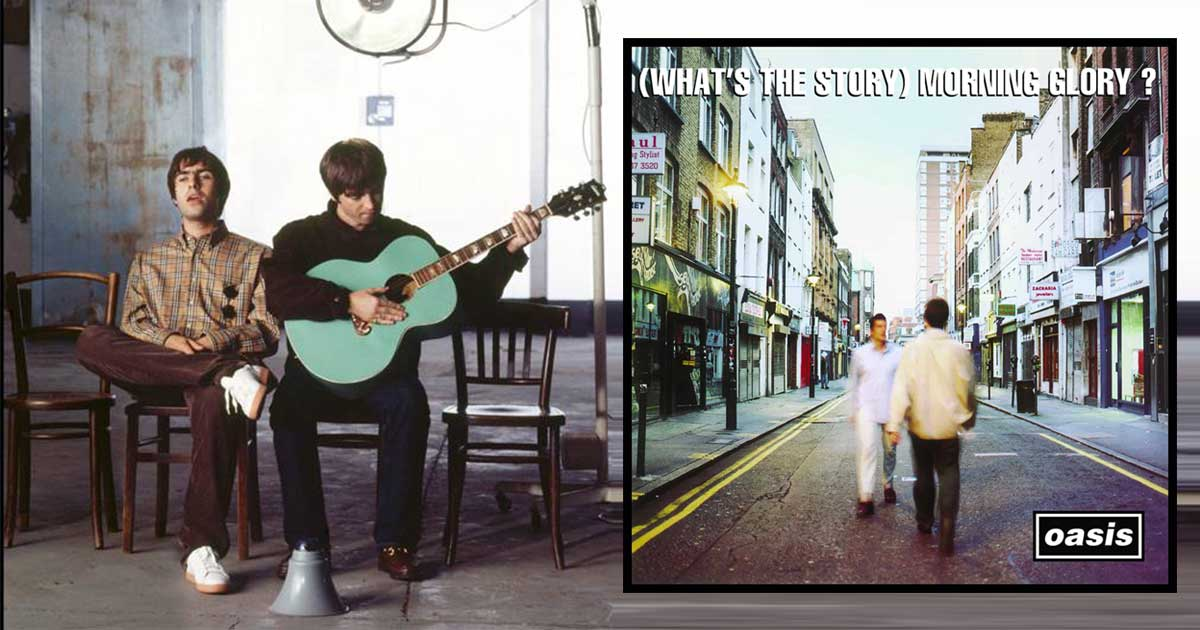
From the outcomes, I could then surface a nice title and tagline. I kept my title really simple, with a very light pop culture reference.
“What’s the Story?”
The tagline was basically a composite of the juiciest prompts and outcomes. It effectively a value proposition:
“How to craft compelling stories that inspire and engage your community”
A little vanilla maybe, but I reckoned it would cut through well with an audience being served up a lot of content to choose from.
But wait! What of that audience? Before setting the topic and outcomes in stone, it was worth taking a step back to make sure what I’d done so far made sense.
2. Audience
I believe a lot of speakers lose sight of this next point. Just like touring DJs, a lot of them are out on the road, doing the gigs, special guest for one night only. The audience is there to see them perform, right? All you gotta do is roll up on stage and crush it.
Perhaps, but every audience is unique. They have different life experiences. They come from a range of cultures. They have varying expectations and knowledge levels. Or, they may have just stumbled into your gig by accident... or worse still, been forced into it attending by their friends/colleagues/boss.
It’s worth investing some time in understanding who’s going to be in the room. After all, people are (hopefully) investing their time, energy, and often money to be with us. Taking some time to think of them is the least we can do.
Note: the exception to this is when you're rocking an arena of 10,000 people. The vast majority just want to hear the greatest hits - but even then it helps to know which hits matter most.
Most conference organizers - even those with very broad range of attendees - know their crowd. It’s worth asking some questions to get a sense of who’s likely to show up for your session. Here are a few starters.
- Have they been to the conference before?
- Where are they based?
- Which other speakers will they be likely to check out?
- Are they coming from a company or attending individually?
This is easy stuff, but it’s so easy to skip. Don’t skip it. Try and get at least two simple personas of who's going to be in the room.
The top-line on my two personas were senior community managers working with senior stakeholders, and emerging community builders working in creative startup environments.
Next was honing in on what this thing was actually for.
3. Purpose
Every talk, workshop, or story has a purpose. Yup, even the most zany and obscure ones.
Here’s a question to ask yourself: What is the purpose of my session?
This simple question is very easy to get tripped up on. Not the purpose for me. What’s purpose for them? What are they seeking? And what would tell me the session was meeting that purpose?
While you may want to do a whole Jobs to be Done analysis here, I found the following steps put me in good shape:
- Choose a couple of key audience personas
- Pick out a couple of the primers you had from the first step (i.e. their desires or goals)
- Cross-check them against the outcomes
- Find a core theme
- Surface a story type
You may want a couple of go-rounds on steps 1-3, but based on the work already done these should be pretty straightforward. For step 4, I went with this:
Rising community builders within rapidly-changing companies want to sharpen their storytelling skills so they can communicate the value of their community to senior stakeholders.
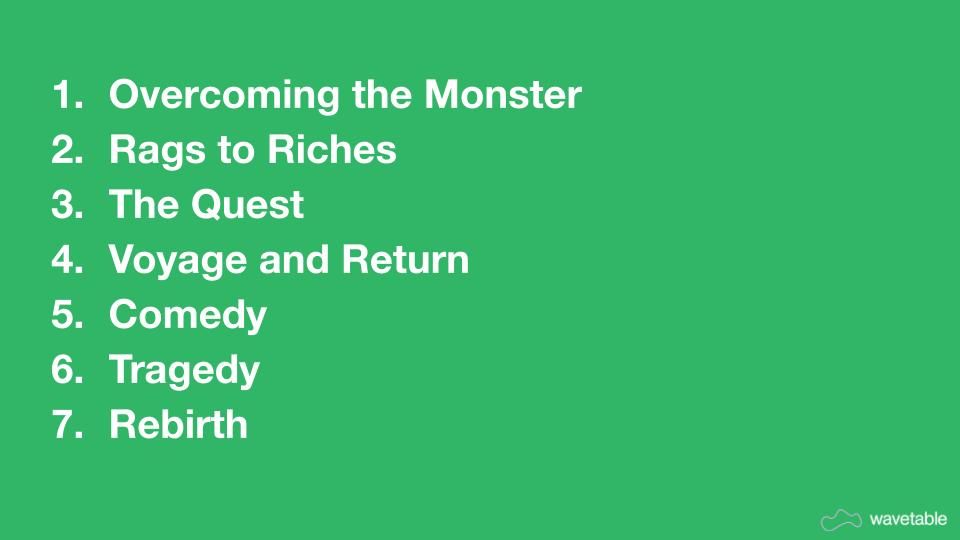
And for step 5, I referenced these 7 story types:

This final step isn’t essential, but I often find it helpful as a tool.
Was this session a story of Rebirth, of a Quest, of Overcoming the Monster?
Who was the hero?
What conflict was being overcome?
Again, you can go crazy here and make storyboards and all kinds of stuff, but just having an eye on the key parts of the story within your session can be hugely valuable.
This story? It was a Quest.
The hero? Not the attendees, but their communities
The attendees’ role was instead as guides.
And the conflict? I reckoned it was in others not seeing the power and magic within these communities.
Our session would give them some tools they could use right away to help them wield this power and weave the magic… and it would instill the confidence to use them.
The session purpose was in place!
4. Structure
So I had some outcomes. I had a decent feel for who was going to be in the room, and what they were seeking to get from our hour together.
Now I needed to build the thing.
The next step was to take the outcomes and create a structure for a 1 hour session.
I did this as follows:
- Create a 5-part plan
- Build a 1 pager
- Add timings
- Construct supporting pillars
- Map back to outcomes
Create a 5-part plan
There are a bunch of ways to define structure. For this one, I deferred to the late, great Ken Robinson.
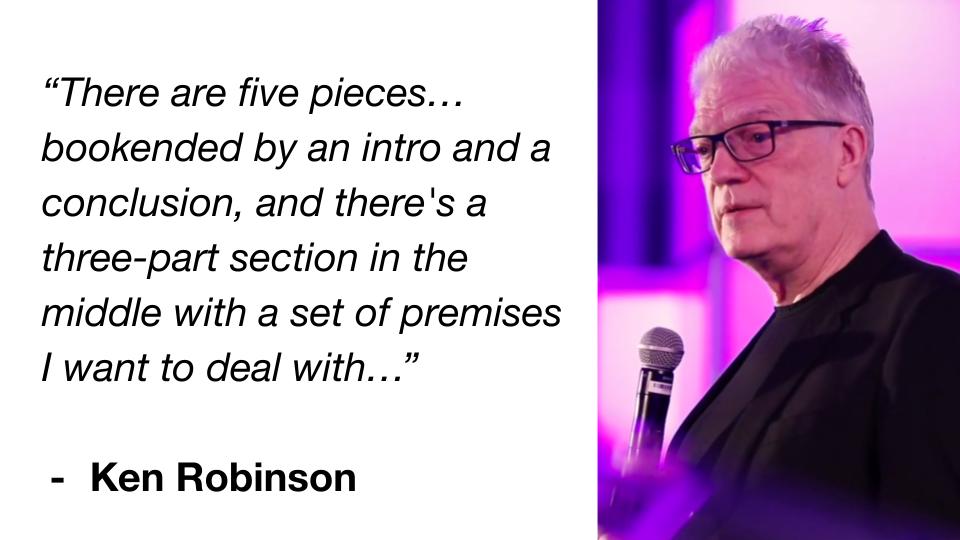
Ken also thought of his hugely popular keynote talks being like the set list of a DJ. More on that later.
Here’s my basic structure:
- Intro
- Why stories matter
- Story types
- Building our own
- Conclusion
There was my personal intro, plus some housekeeping. After that was some content on why the audience should care, with some proof. Then some knowledge transfer, followed by a hands-on section to apply that knowledge to their own project. Lastly, I’d sum up everything we’d done. Sweet.
Build a 1-pager
I fleshed this out as a 1-page Google Doc, integrating both the outcomes and also a couple of those original primers from the CMX team.
The third part (“Building our own”) was especially important because this session was being billed as a workshop. It had to have interactivity, and given the entire session was only an 1 hour with an audience I hadn’t met before, I needed to allow as much space and time as possible for this section.
I knew from previously running large-scale workshops that Breakout Rooms, while I love them, could be a bit of a mess. If 10 people showed up it’d be fine, but if 100, 200 or 500 people appeared, I’d be in real trouble, and it would be really hard to hit the outcomes. Instead, I opted for the workshop element being single player - a step-by-step ‘build your own’ scenario using a Google Doc or virtual whiteboard tool.
Add timings
Already, the workshop requirement gave me constraints on the other bits. I could see pretty quickly I’d need a timing plan along the lines of:
- Intro (10)
- Why stories matter (10)
- Story types (10)
- Building our own (20)
- Conclusion (10)
Construct supporting Pillars
Next, I added a couple of supporting pillars underneath each of my 5 parts. Very quickly a structure emerged. Here it is (less the outcomes and primers so it’s easier to read):
- Intro (10): Host intro, HG intro, Agenda / Learning Outcomes
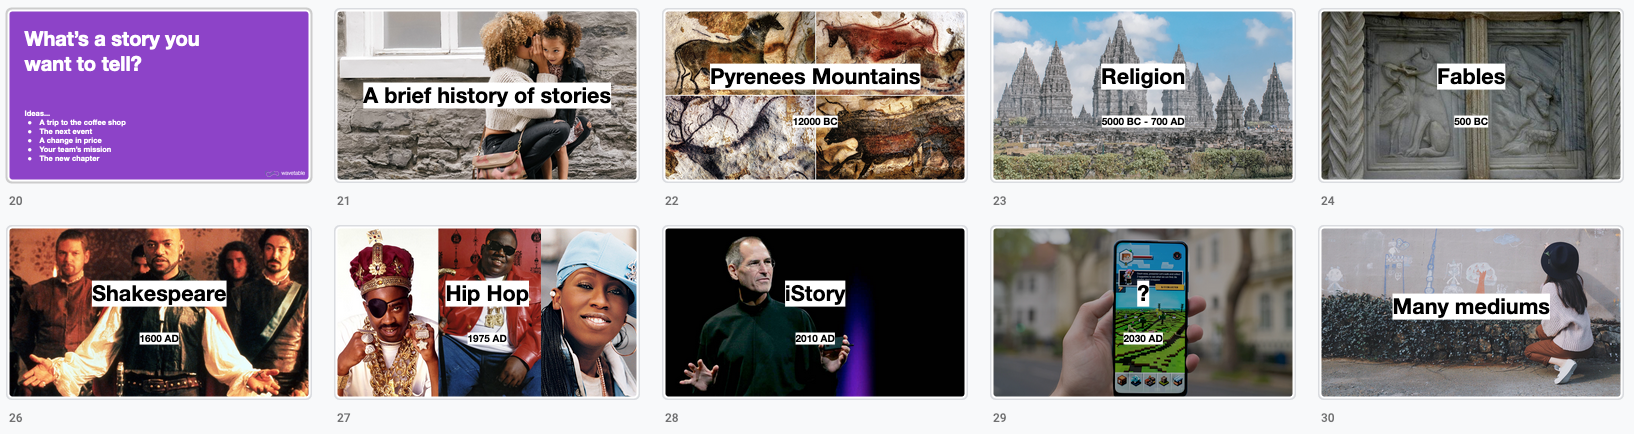
- Why stories matter (10): Why you should care, History of stories
- Story types (10): 7 types w/ examples
- Building our own (20): Workshop setup, Workshop session
- Conclusion (10): Tips & Resources, Summary / CTA
Map back to outcomes
Finally, I cross-checked the outcomes and primers against the plan. Could I hit the outcomes? I reckoned I could, but the timing plan felt tight.
I wanted at least 25 minutes for the workshop part. Perhaps I could nudge a couple of pieces into the workshop section somehow. But I wasn’t yet sure how, so I held this back for later.
You may be thinking this plan looks loose. You’d be right. I’ve learned the hard way that adding too much structure - especially early on - makes things very rigid and difficult to pull apart later. Best to keep some flex.
With this 1 pager in place, I was ready to start collating.
5. Collating
Perhaps you’ve noticed there is still zero content in place for the session. We’ve held back for good reason, but now is the time to start adding it.
This is also where it pays to think like a DJ. The best DJs aren’t just selectors: they’re collectors and collators. The same is true for building talks and workshops. We want to collate and collect, so we can then curate, select, and play.

For me, this has 4 phases:
- Segments
- Vaults
- Links
- Discovery
Segments
I wasn’t coming at this session completely cold - after all, they probably wouldn’t have booked me if I had zero pedigree in the topic. On the other hand, I’m not the kind of (information) DJ who wants to play the same set every time.
I find a happy balance comes by taking a similar approach to some DJs I know. Segments are existing sequences of connected content that can be mapped into the next gig.
First I grabbed a few segments from some semi-related decks on networks and brand positioning and pasted them into a fresh “What’s The Story?” deck.
Next, I dug into my most relevant bit: a talk called "Tall Stories". I knew this had some good segments in it, particularly around ‘Why Stories Matter’. I loaded up the Tall Stories deck, and again grabbed a bunch of the slides and pasted them into the “What’s The Story?” deck.

Throughout this stage I deliberately took more than I needed and included some stuff that was very unlikely to make the cut. To mix music and movie metaphors, it’s much better to have too much raw footage than not enough.
Note: As with many types of work, if you look back 6 months and don’t feel a little embarrassed, you’re not growing enough. This definitely applies to keynotes and workshops. The Tall Stories deck was 2 years old and definitely not fit for purpose today - but it still had valuable segments that I could come back to and remix.
With a handful of segments, the set was starting to build. But there was still plenty to do.
Vaults
Next was going through my vaults. A DJ would treat these as individual tracks, or even just loops and samples. For me, this was all the little story bits woven within previous courses and talks on other topics. And then there were other resources stashed in Google Drive folders, PDFs on my desktop, and screengrabs and lists in my Notion space.

Unfortunately I’m not the best at organizing all this cleanly, so the vaults step usually takes a while. Throughout this stage, I was again very liberal with decision making. Flipping between the Google Doc one pager, the material, and the destination deck, I chopped, grabbed, and pasted all manner of stuff into the deck. The only structure in the deck itself were brightly colored title slides to easily mark out each of my three main sections.
After going through the Vaults, I ventured into Links.
Links
Links were resources I knew were interesting, but hadn’t dug into much before. For a DJ these are tracks they’ve listened to before, or at least been tipped off about, but haven’t yet committed to. Again, my links were stored in a variety of places, so this meant a fair bit of time investment on reading, absorbing, citing, pasting, etc. (note to self: hire a productivity consultant).
It’s worth mentioning there’s a fine line between Links and the next step of Discovery. I tried to focus on getting the best of the links I already had, and held back on clicking out into rabbit holes. The new, as-yet-unknown resources were saved for the final phase.
Discovery
The final step has two pieces to it: open exploration, and focused research.
First, I go out exploring - the aforementioned rabbit holes, followed by trawling Twitter, Are.na, Pinterest, and whatever other portals feel relevant for the topic at hand.
Once I have a bunch of interesting stuff, I’ll review what I’ve got to see where there are holes or elements that need more fleshing out. I may dig into some science behind a concept, or find a counter example to the one I’m sharing. This is the equivalent of a DJ going deep into the back catalogue of an artist they’ve just discovered, or learning about a certain production or mixing technique.
Depending on the topic, this can of course be a big undertaking. For this session, the first two steps had yielded a really strong set of material, so my Links and Discovery steps were relatively short.
Note: Every workshop has a Multiplier Effect You want to be careful here. This session was more like a keynote and very content-heavy, so the multiplier I share in that post are a bit light. I spent about 40 hours on design in total.
Phew. Now I had a ton of stuff in place, and a deck bursting at the seams.
To sculpt this into a production-ready session, it was time to do something a little counter intuitive: repeat myself.
6. Repetition
We can’t expect people to grab everything right away. Attention is fragmented, after all. To get our message across, repetition matters. But obviously we can’t repeat everything - we’d run out of time and ironically we’d lose people’s attention too.
What to do?
Here’s a 4 step process I use to figure out what to repeat.
- Set
- Subtract
- Repeat
- Flow
Set
First, I wanted to really nail down the key stuff. Which elements just HAD to stay? What was critical to the story I was trying to tell here?
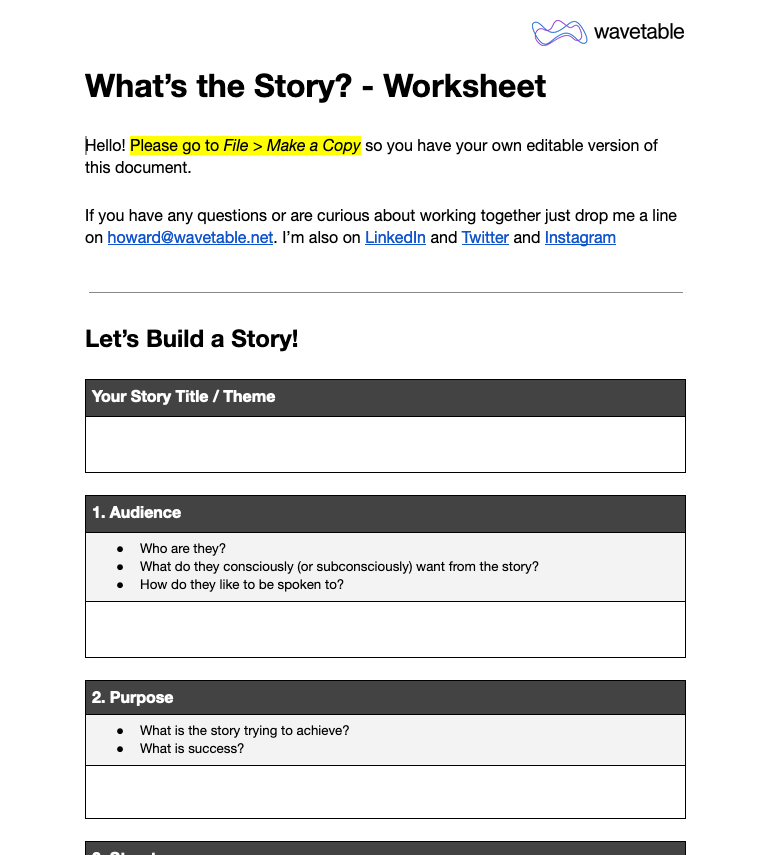
The workshop part was critical, so the step-by-step for that had to stay in. Given how importance this section was, I began fleshing out the worksheet for the workshop element. Miro or similar felt fun, but given the group size, time constraints and wanting to design for best possible accessibility, I went for a good old Google Doc. (I’m not going into workshop design in detail here - search my other posts for a bunch of resources on that topic)
The other bits that became Set were the parts on the history of stories and the ‘why you should care’. In total, that was about 50% of the session set in place and ready for polishing.
Subtract
What about the rest? It was time for some subtraction.
The first thing I do here is to look at anything that is NOT a key part of the story AND can be bundled into post-session resources. A good example are quick tips and case studies. Audiences often really like these, so in a longer form workshop I’ll keep them in, but this thing was a power hour so they had to get chopped.
I’m also terribly self-indulgent at times and make my intros too long, so I knew that could be cut. I found a smart way around it this time, though: I turned my intro into a short story that I called back later on (yes - a storytelling technique!) when explaining the Creating Structure concept. This justified it being a little longer than normal - it actually had some material value.
The History of Stories section : everyone could make the leap without me filling in the blanks.
I had a fun riff around 1970s UK TV host Ronnie Corbett. But it had to go. Same with some stuff on making movies and anime.
After ongoing culling, I was left with something a little too fat - but not by much, maybe 10-15%. That was ok. I could massage out these kinks a little later. It was time to double down.
Pro Tip: Don’t delete. Cut. You may want to bring some parts back in later, or use them for a future gig. I don’t know (m)any DJs who just straight up delete music out of their library.
Repeat
Of the stuff that was Set, a few bits beared repeating. Going back to the original primers I’d be sent, I targeted 3 things to reiterate:
- Why stories matter for this audience
- The 7 story types
- A message of empowerment (you don’t need to be Shakespeare or Seinfeld to do this).
With a bit of weaving and shifting around I found some extra places to push those messages home.
Flow
Now was a good time to review the flow of the session.
- Does it all hang together?
- Are the transitions between sections smooth, or are they clunky?
- Are you repeating yourself a little too much?
- Could that fun story that just got cut find a valuable home somewhere else in the session?
I suggest reviewing the flow several times during your design process. However, if you’re only going to do it once, this is a good time - because next we’re adding some extra depth.
Let's take a Pause for a Cause
Before that though, let’s take a brief pause for a commercial break, and a recap of what we've done so far.
First, the commercial break.
If you want more resources and ideas to move your work forward, you should sign up for my newsletter >.
Recap
At this point I had a solid structure, a bit too much content, and the workshop pretty much sorted.
A few slides had full design already done, but most of it was raw stuff that I’d grafted in.
The session was now at the point I call ‘roadworthy’: legible enough to run if for some reason it started 5 minutes from now and I had to just go with it.
Pro Tip: I find this ‘roadworthy’ milestone very helpful, especially when it comes to overbuilding. It’s a smart move to get your project roadworthy as soon as you can. Better to show up with a skateboard than a Tesla with no engine.

Of course, roadworthy doesn’t mean finished. This session all hung together - but it lacked a certain something. Time to add some emotion.
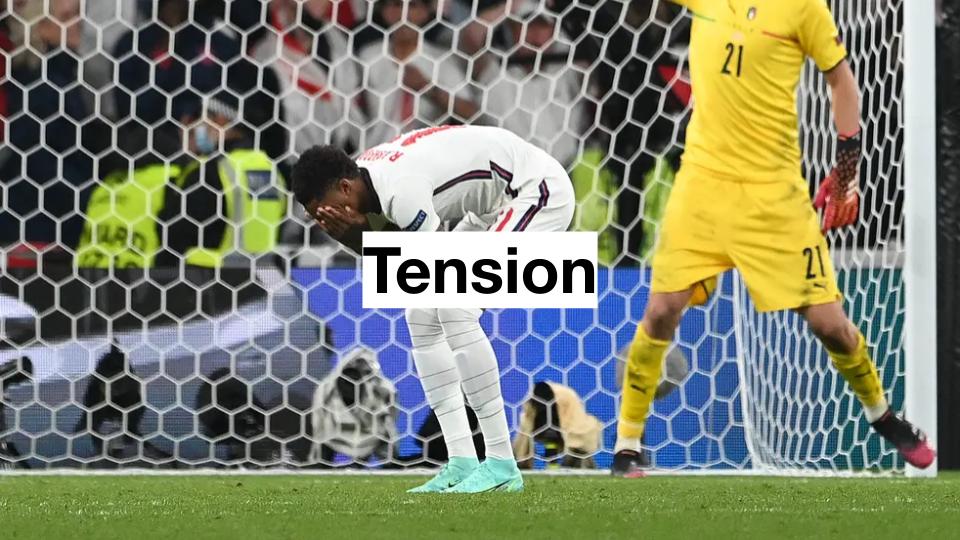
7. Emotion
For a talk, the two most fundamental emotional elements are Audio and Visual. We can also get into crowd interaction, body language and all that, but surfacing some Audio and Visual emotion within your material will still take you far.
Visual
Because a picture says 1000 words, it was time to add some visual emotion.
Now, deck design is a once again a whole other topic (there’s a post on it here!), but here’s the super basic overview of how I tackle it:
- Strip nearly all the text out
- Paste it into the presenter notes
- Add an image under the remaining text, ideally taking up as much of the slide space as possible
- Refine the text so there’s just one word, or at most a short sentence or a few bullets
- Slim down the remaining notes to two lines, ideally a mini story
And of course, the images should ideally convey some kind of emotion.
Pro Tip: Adding visuals is a difficult beast - some of us can easily burn many, many hours on this part. If in doubt, focus on being roadworthy.
Audio
Once I was done with the visuals, it was time to test the audio. There weren’t any external videos or audio clips in this session, so the Audio part was… well, me.
At this point I did a dry run of narrating the deck with presenter notes switched off. There are a few reasons for doing the dry run:
- Get a feel for the overall flow and timing
- Sense where more or less emotion is needed
- Notice where the bumps and rough transitions are
- Start making connections between words and pictures
The idea behind this last point is that I should soon be able to mentally trigger the slide’s key point, its background info, and the transition to the next bit just by looking at the image and the few words of text. This needs practice, and I’m certainly not a master at it, but it’s a very handy skill to develop.
As for the dry run itself, I hardly ever do a real-time runthrough (i.e. an hour). For this one I spent 10-15 minutes whizzing through the full deck, then zoned in on some particularly important and/or complex parts.
And as you’ve probably guessed, for some parts I needed to go back to the steps listed above and re-cut them (the ‘Subtract’ part of the 'Collating' step may come back into play here - hence why stuff should be cut, not deleted)
The other thing I began to look at here was Contrast.
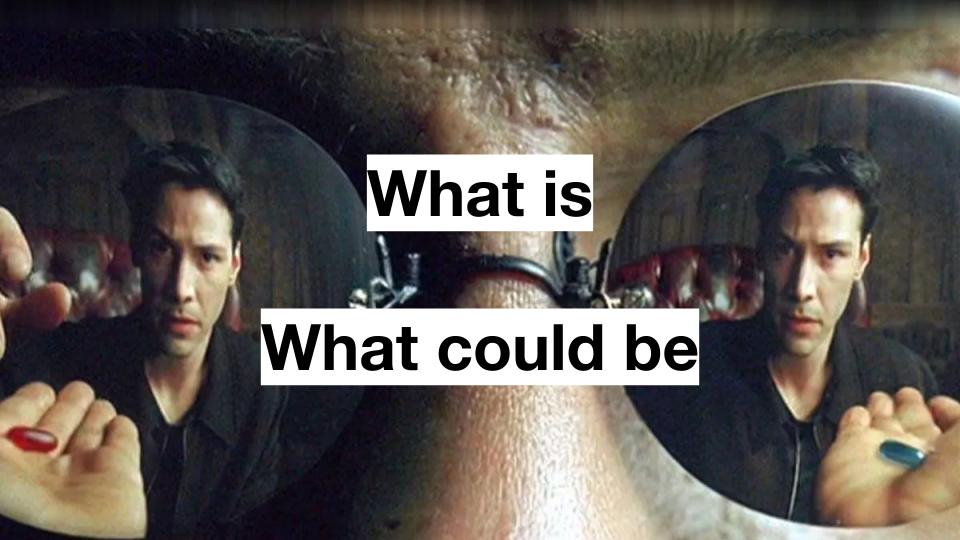
8. Contrast
Contrast is a key part of storytelling. Perhaps the most obvious example of contrast is in the movie The Matrix:
The guide shows the hero two possible worlds.
He offers him The Blue Pill or The Red Pill.
The hero has a choice between The Status Quo or The What Could Be.
For this session I didn’t need to spend a ton of time adding contrast, but it was a helpful tool when it came to sharpening it up and amplifying some key points.
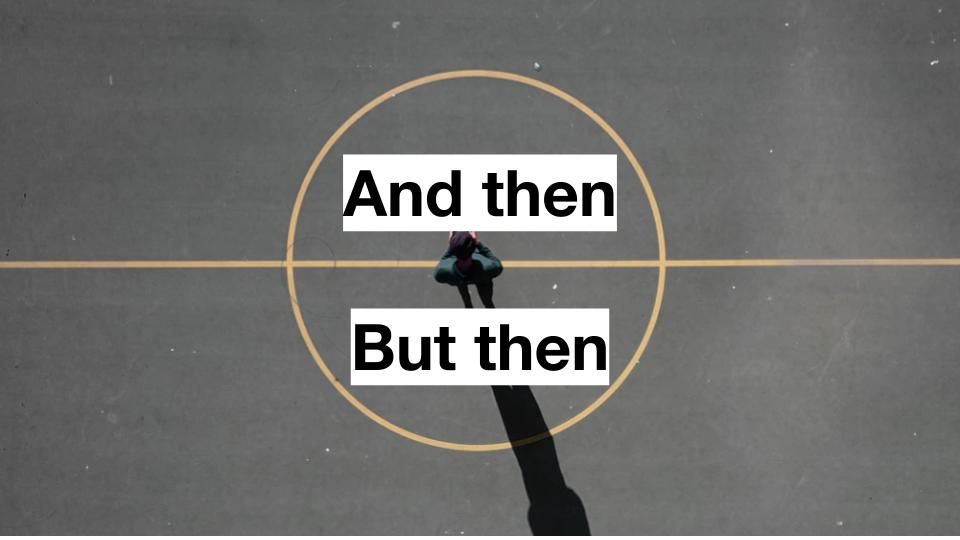
I added some simple contrast in three places:
- Showing the difference between two types of storytelling techniques (‘And Then’ vs ‘But Then’)
- A provocation to the audience about dealing with the fact they’re probably not Aesop, Oprah, or Steve Jobs.
- The cheeky commercial break in the middle of the heads-down workshop section
As per the above step, contrast can be used in visuals, text, verbally - as well as body language, group interactions, and so on. It’s a very powerful tool when used with care and skill.
Speaking of which, my final design step was adding novelty.
9. Novelty
Us humans just can’t resist novelty. There's a reason novels are such a popular and enduring medium, after all.
When it comes to offering novelty in our stories, there are a bunch of ways to inject it. Here are a few:
- Fresh perspectives
- Alternative uses
- Surprising insights
- Unexpected twists
- New approaches
- Shock-and-awe moments
Novelty is a valuable element of storytelling - and a presentation is not exempt from this.
However, we must use it carefully. We shouldn’t make things novel for the sake of it, nor make them too new. Despite our desire for the novel, we don’t actually like things that are completely new; we like a sense of both freshness and familiarity.
As Derek Thompson shares in his book 'Hit Makers', it’s helpful to use the concept of New Wine aged in Old Oak.
With that in mind, I added just a handful of touches that I felt were novel for the audience, yet also familiar enough not to put them off:
- I opened with a story about a Citroen 2CV (before I'd even introduced myself)
- 80s cult hip hop hero Slick Rick was included as an example of a great storyteller
- The workshop used a Google Doc as a portable, open worksheet
- Mmhmm was used as my delivery tool

With that, the session was looking strong.
There were just two more short steps to take before delivery.
10. Back to the Story Type
Earlier on I mentioned 7 Story Types. For the final part of the process, I checked back in on the story type I’d chosen.
As I went along I wondered if we were going to end up Overcoming the Monster. I think we probably still were to a degree - it was almost a subplot - but the core of this story was The Quest.
Having this in the back of my mind would be helpful when it came to delivery - and if anything went off-track I could remind myself that The Quest is what we were all there for.
11. Final Finesse
For the final step, I ran through the deck a few more times. I did this on both my laptop and also my phone to see if I could riff all the pieces in different contexts.
Inevitably a few bits got culled during these run throughs. I can count on one hand the amount of times where I’ve regretted culling vs. regretted leaving something in.
Pro Tip: Be a time pessimist. If it feels a touch too much, cut it.
However, I still didn’t do a ‘proper’ time check - running through the entire hour in real time. You may like to, but I felt I had a good sense of how long each element would need and also where I could trim on the fly.
Pro Tip: Always have a few things you can cut out live in session without breaking the flow. I tend to have 2 or 3 ‘soft tissue’ bits that if needed I can slice through without causing serious pain.
The final step was to get my delivery assets in place. Aside from technology stuff like a mic, camera and other paraphernalia there were just four things I needed:
- Presentation Deck (Google Slides)
- Worksheet (Google Doc)
- Text file with links to worksheets and other resources (so I could easily drop them into the chat)
- Notepad (just in case)
And then before I knew it, it was time for delivery…
A quick note on delivery
I’ll level with you. I planned to write a whole bit on the delivery (including tech check, using a green screen, dealing with audience questions and so on), but I want to create a fresh post for that. This one is already over 5000 words!
In the meantime, you can check out my other posts on facilitation and storytelling, and if you’re curious to see the CMX Session in full, here it is:
But before I leave you, here’s a quick bonus round.
12. Bonus: Landing the gig
This is a question a lot of people have but never really ask:
“How did you land the gig?”
The answer in this case is relatively simple, but I want to share it in case it’s helpful for your own journey.
It started with a podcast. In late 2018 I was setting up the second season of our ‘Tickets’ podcast and sent a speculative cold email to Duolingo’s head of community, Laura Nestler. To my delight, she got back to me saying she’d love to be a guest. It took a couple of months to schedule the recording, and then a few weeks more before it published.
We stayed in touch during 2019 and in one of our email she mentioned a community she was a member of that may be worth checking out. I began following the founder of this community online, reading his tweets and checking out some of his company’s work.
Fast forward a year or so, and we were looking to share some of our work around how to design and deliver better workshops. Suddenly I remembered this community founder. We’d never spoken before, but I took a punt and sent him a Twitter DM, offering a free workshop for his membership. He came straight back to me, and introduced me to his team at… you guessed it - CMX.
During Summer 2020 we ran a 90 min workshop workshop for their members. The team were great to work with, and the community were full of ideas and curiosity. A few months later, I dropped a note to the CMX team to check in and see if there was an opportunity for us to do something again. This time, they asked if I’d like to be involved at the Summit. And that’s how the story of this storytelling session begins.
The main reason I’m sharing this is that the path to these things is rarely as straight as we like to think.
It took over 2 years from start to finish, and the idea of speaking at the conference wasn’t even on my radar until those emails at the end of 2020.
So, when it comes to asking the question “how do I get more speaking gigs?”, maybe the answer is to ask yourself a slightly different question.
Phew! There ya go. A full breakdown of how I built a 1 hour workshop/keynote session.
If you have questions, comments, or want to chat about working together, I'd love to hear from you - feel free to drop me a line >